This function is used to create new users, change user details, deactivate existing users and reset a user's password.
To create a new user, click the New User button:

Enter the compulsory fields: User ID (no space and no apostrophe symbol allowed), User Full Name and an a valid Email Address.
Tick the Activate Account box and click the Update button.
An email will be immediately sent to the new user, requesting them to enter a password to complete setting up their account.
The Default Company field can be used to default to this company for the user whenever there is a dropdown list to select a company. Different users can have a different default company each.
The User Location field can be used to set the default company for the user if there are more than one company set up in the system. If you use the Compliance Survey function, the location will identify to where the user belongs. Use the name of an active organisation unit that is in the Organisation Unit library. See note below.
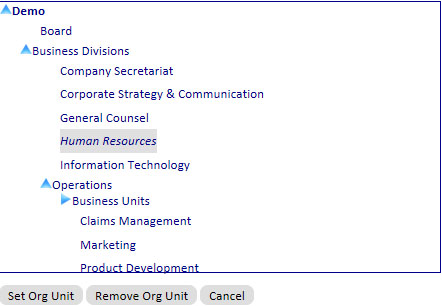
Use the Default Incident Location to automatically attach a default organisation unit to a new incident created by the user. Click the Select button next to the Default Incident Location field and select an organisation unit from the pop-up organisation tree. Click Set Org Unit to attach or click Remove Org Unit to detach.

If the user is only allowed to register incidents with no authority to do anything else, tick the Incident Registration Only box. Users with this access level will not be shown on the User Access Control screen and hence cannot be granted with any additional access privilege.
Note: Once a user is created, the User ID cannot be changed. To change a User ID, deactivate the existing user and create a new one.
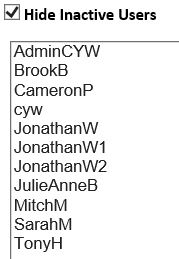
To request a user to enter a new password, select the user from the list, ensure the email address is correct and click the Reset Password button. An email will be sent to the user with a link to the Password Reset screen. The link is valid for 24 hours, after which time another reset email will need to be sent.
To deactivate an existing user, select the user from the list:

Remove the tick from the Activate Account box by clicking it and click the Update button.

GuardianERM.net supports Microsoft Azure Active Directory Single Sign-On (SSO). This feature allows an organisation to access GuardianERM without the use of passwords and simplifies integration into existing intranets and more. The SSO feature also includes a unique sub-domain for an organisation, allowing for greater ownership of a database (e.g. company.guardianerm.net). This sub-domain is linked to the Azure AD tenant ID of your organisation, ensuring no external users can access your database.
SSO can be assigned for individual users, or can be enforced for all users (in Admin/User Login and Password Rules).
If SSO is not enforced, users in GuardianERM that are not part of your organisation can still access your database using the old login method with their set password by visiting the general website domain guardianerm.net.
To enable SSO for a user, login to the Admin Module and select the desired user. Check the “Allow single sign on” tickbox and press Update. If this option is not available, contact support to discuss adding SSO for your organisation.
If SSO is enforced then all users must have an account in your organisation's Microsoft/Azure Active Directory. In this case, all passwords are cleared and no external users will be able to access your GuardianERM system. The "Allow SSO" checkbox will be disabled and ticked for all users.
Note: While SSO is turned on, a Reset Password cannot be performed as SSO does not utilise password management.

The next time the user accesses GuardianERM, be sure to direct them to the sub-domain associated to your SSO (e.g. company.guardianerm.net). The link will automatically open the Home screen for that user, or if multiple accounts exist with their email, a selection screen will appear to allow them to select which user they wish to login with.
If a user’s GuardianERM SSO session expires, simply press “Click here to login again” and they will be automatically logged back in.
If you want to create an administrator account, start the User ID with Admin, e.g. AdminCYW, Admin.Mary. If you want to create a local administrator, tick the Local Administrator tick box. A local adminstrator can only manage user accounts and user access authority for the specified organisation unit in the User Location field. An administrator does not have user function access so you do not have to set User Access Control for the user.
See also: